How to install and run the SSJS VSCode Extension
💡 The extension is still in a closed Alpha. New access is given every day. Join the Waitlist
About the SSJS for Marketing Cloud Extension
SSJS for Marketing Cloud is a VSCode extension that lets you write modern javascript syntax, and have it compile automatically into SFMC-safe SSJS code that you can directly in the editor and see immediate responses in the console.
- Write ES6 Syntax: Imports, Classes, Arrow Functions, and more;
- With one command, your code is executed directly in your Marketing Cloud instance via a secure CloudPage proxy that you control and own;
- The results of your script are streamed directly into your VSCode terminal for immediate feedback;
This guide explains how to set it up for the first time.
Installation
Since this extension is still in alpha, it has not been published to the VSCode marketplace yet, and access is given in priority order from my waitlist.
In your email invite, you will find a link to the VSIX extension file, download the file and, in VSCode:
- Click the Extensions menu
- Click the three dots at the top of the extensions list and choose
Install from VSIX
Setting up for the first time
To make sure only authorized users can run code in your instance, the extension uses a private CloudPage link and tokens stored in a Data Extension that you have to configure.
1. Create the SSJS_Tokens Data Extension
In the instance you want your code to run, create a data extension with the following properties:
- Name: SSJS_Tokens
- External Key: SSJS_Tokens
- Fields:
- Token (Text, max characters 100)
- isActive (Boolean)
2. Add a token to your DE
- Create at least one record in the DE. Generate a secure token (suggestion randomkeygen).
- Make sure to set the
isActivefield to true
3. Create the Code Resource
- In CloudPages, create a new Code Resource of type JSON and paste the code below:
- Save the Code Resource and Publish it. The Name and URL format do not matter here.
4. Setup the extension
Open a folder in VSCode and:
- Create a
.envfile in the root directory of your project folder - Paste the following code and substitute the values for your token and cloudpage url:
Setup is done!
How to use the Extension
1. Create your TypeScript file
Now the fun part! In the same environment you created your .env file, create a .ts (TypeScript) file and write your SSJS:
2. Test Direct Execution
- Hit
CMD+Shift+Por (Ctrl+Shift+Pon Windows) to open the command pallete - Search and run the command
SSJS: Run Script - If everything was setup correctly, you should see
Hello from VSCodedirectly in the output console
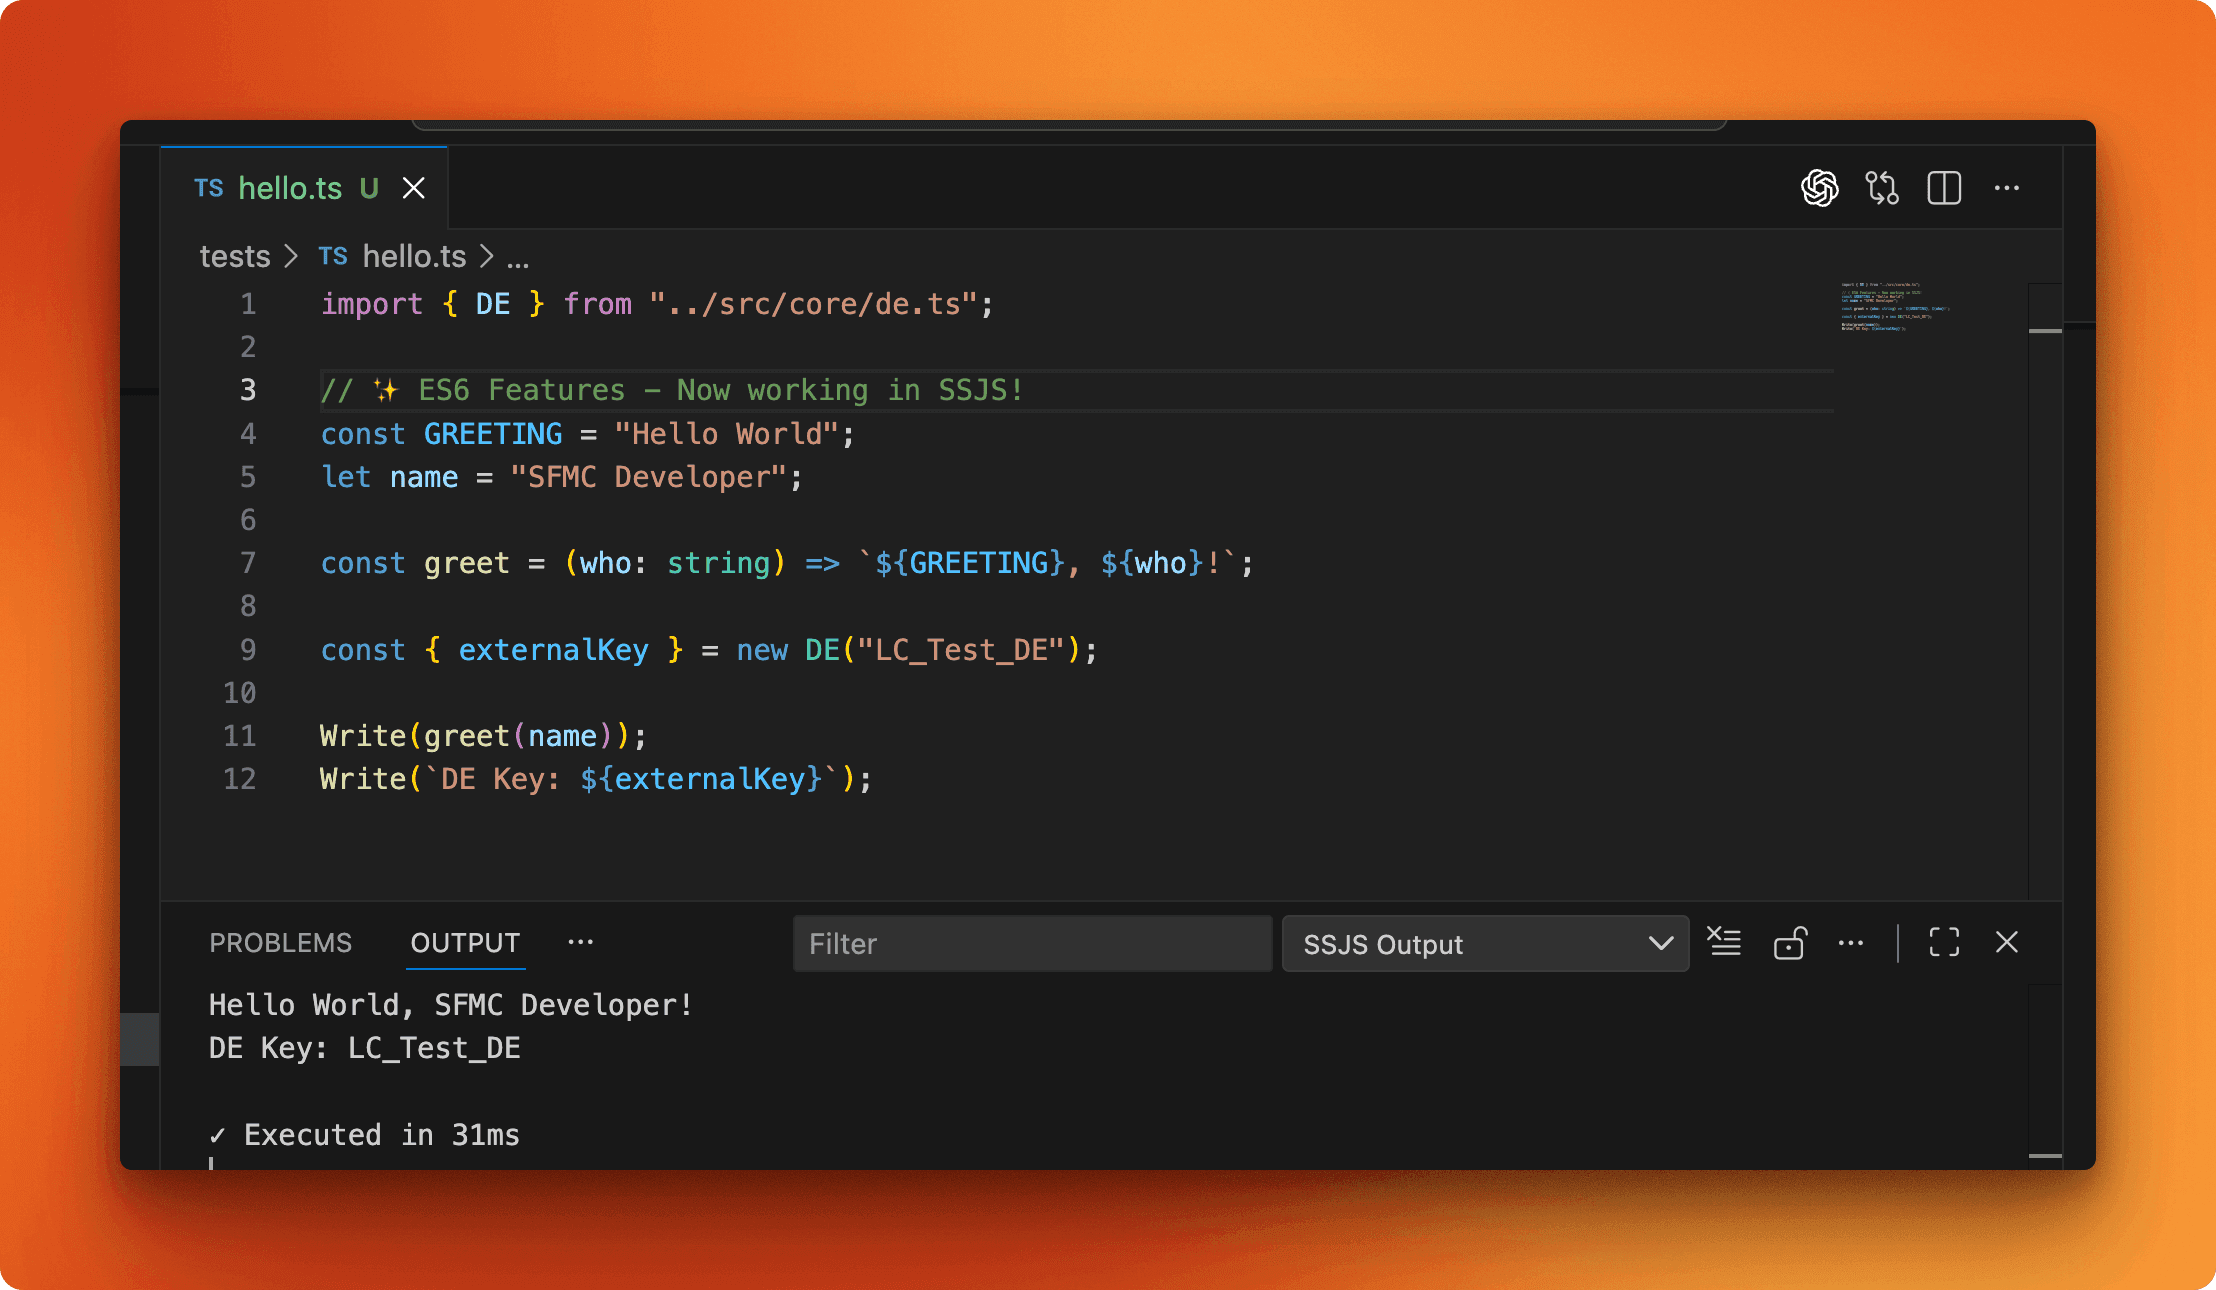
3. Write modern TypeScript
In your .ts files, you can separate your code into modular files and use the modern TypeScript Syntax:
- Import
- Arrow Functions
- Classes
- … and more! (we are adding support for polyfills of modern syntax)
- run the code using the
SSJS: Run Scriptcommand and get instant feedback
4. Test Local Bundling
- Use the command
SSJS: Build (Bundle to Single File); - Look for new folder
dist/created next to your file where the generated SSJS file is is saved; - Use this process to build scripts you can deploy to CloudPages or Automation Studio.
Contribute and Provide Feedback
If you have any direct feedback, feel free to reach out directly to me via LinkedIn or via email at hello@lucascosta.tech. Once the beta tester pool increases, I will create a Discord server to gather feedback so watch your email for the invite.
Thank you so much for joining the waitlist and testing out the SSJS for Marketing Cloud extension and happy coding.
Enjoyed this post?
Subscribe to get insights on marketing engineering, data-driven growth, and building better systems.
No spam. Unsubscribe anytime.